
yamaha outboard gauges manual
Lost your Yamaha outboard gauge manual? Don’t sweat it! We’ve got the manuals you need to diagnose issues & keep your engine running smoothly. Download now!
Yamaha Outboard Gauges Manual: A Comprehensive Guide
Yamaha outboard motors boast reliability, yet issues can arise. This manual offers a detailed exploration of Yamaha gauge systems, aiding boaters in understanding and maintaining optimal engine performance and fuel efficiency.
Understanding Yamaha Outboard Gauge Systems
Yamaha outboard gauge systems are integral to monitoring engine health and performance, providing crucial data for safe and efficient boating. These systems have evolved significantly, transitioning from traditional analog displays to sophisticated digital interfaces, and increasingly incorporating Command Link and NMEA 2000 compatibility.
Historically, gauges delivered essential information like engine RPM, coolant temperature, oil pressure, and voltage. Modern systems expand upon this, offering real-time fuel consumption, water pressure, and diagnostic trouble codes. Understanding the core components – sensors, wiring harnesses, and the display unit itself – is fundamental.
Yamaha prioritizes reliability, but proper installation and maintenance are key. Gauges communicate vital engine parameters, allowing boaters to proactively address potential issues before they escalate. Familiarity with these systems empowers informed decision-making on the water, enhancing both safety and the overall boating experience. Recognizing the interplay between gauges and the engine’s electronic control unit (ECU) is also crucial for effective troubleshooting and optimal performance.
Types of Yamaha Outboard Gauges
Yamaha offers a diverse range of outboard gauges catering to various boating needs and preferences. Primarily, these fall into two categories: analog and digital. Analog gauges, the traditional choice, utilize needles and scales to display information like RPM, speed, and temperature. They are known for their simplicity and direct readability, often requiring minimal wiring.
Digital gauges, conversely, employ LCD or LED screens for a more comprehensive and customizable display. These gauges can present a wider array of data, including fuel consumption, voltage, and diagnostic codes. Command Link compatible digital gauges offer advanced features like engine synchronization and data logging.
Furthermore, Yamaha integrates with NMEA 2000 networks, allowing gauges to share data with other marine electronics like chartplotters and autopilots. Specialized gauges exist for specific parameters, such as trim angle and water pressure. Selecting the appropriate gauge type depends on the engine model, desired features, and the boat’s overall electronic architecture.
Analog Gauges: Features and Operation
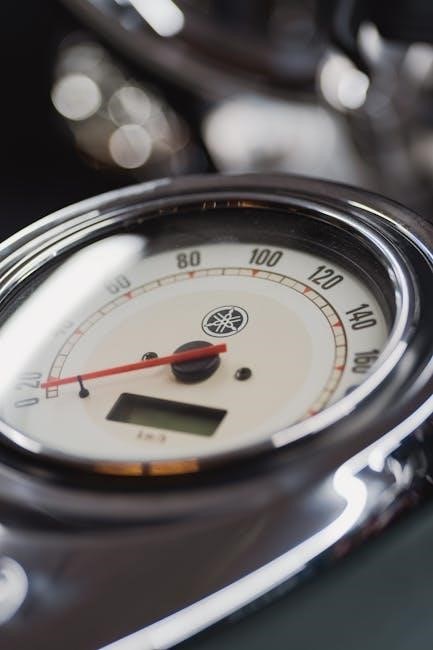
Yamaha analog outboard gauges provide a straightforward method for monitoring essential engine parameters; Common types include tachometers (RPM), speedometers, voltmeters, temperature gauges, and fuel level indicators. These gauges typically feature a circular dial with a needle pointing to the current value on a calibrated scale.
Operation is generally intuitive; the needle’s position directly corresponds to the measured value. Many analog gauges incorporate lighting for nighttime visibility and may include protective lenses to withstand marine environments. Some models offer features like peak RPM recall or audible alarms for critical conditions.

Installation usually involves connecting sending units to the engine and wiring the gauge to a power source. Calibration may be required to ensure accurate readings. While less feature-rich than digital counterparts, analog gauges are valued for their reliability, simplicity, and affordability. Understanding the specific markings and ranges on each gauge is crucial for proper interpretation.
Digital Gauges: Features and Operation
Yamaha digital outboard gauges represent a significant advancement in engine monitoring technology. These gauges utilize LCD or LED displays to present information numerically and often graphically. Common functions include displaying RPM, engine hours, coolant temperature, oil pressure, voltage, fuel consumption, and diagnostic trouble codes.
Operation typically involves navigating menus using buttons or a joystick. Digital gauges often offer customizable displays, allowing boaters to prioritize the information most relevant to their needs. Advanced features may include data logging, multiple engine monitoring, and integration with GPS systems.
Installation generally requires connecting to a Yamaha Command Link network or NMEA 2000 backbone. Calibration is often automated or simplified through digital interfaces. Digital gauges provide greater precision, versatility, and diagnostic capabilities compared to analog gauges, though they may require more complex setup and troubleshooting.
Command Link Compatibility
Yamaha’s Command Link system is a proprietary digital communication network designed for seamless integration between the outboard motor and various gauges, controls, and accessories. This system allows for comprehensive engine monitoring and control directly from the helm.
Command Link compatibility ensures that gauges can display a wide range of engine parameters, including RPM, speed, fuel consumption, water temperature, oil pressure, and diagnostic information. It also enables features like digital electronic control (DEC) shift and throttle, and allows for synchronization of multiple engines.
To utilize Command Link, compatible gauges must be connected to the engine via a dedicated Command Link network cable. Proper installation and configuration are crucial for reliable communication. The system offers advanced diagnostic capabilities, providing boaters with valuable insights into engine performance and potential issues. Utilizing Command Link enhances the boating experience through improved control and monitoring.
NMEA 2000 Integration
Yamaha outboard gauges increasingly feature NMEA 2000 (National Marine Electronics Association) compatibility, a standardized data communication protocol widely adopted in the marine industry. This integration allows Yamaha gauges to seamlessly share information with other NMEA 2000-enabled devices onboard, such as chartplotters, GPS receivers, and autopilots.
By connecting Yamaha gauges to an NMEA 2000 network, boaters can consolidate engine data with navigational and other vessel information on a single display. This provides a comprehensive overview of the boat’s status and enhances situational awareness. Data shared can include engine RPM, speed, fuel flow, water temperature, and diagnostic trouble codes.
Proper NMEA 2000 installation, including correct cabling and network termination, is essential for reliable data transmission. Compatibility ensures interoperability with a broad range of marine electronics, offering flexibility and expanding the functionality of your vessel’s instrumentation.
Installing Yamaha Outboard Gauges
Yamaha outboard gauge installation requires careful attention to detail to ensure accurate readings and reliable operation. Begin by consulting the specific installation manual for your gauge model, as procedures can vary. Typically, installation involves mounting the gauge securely in a suitable location on the vessel’s dashboard or console, protected from direct sunlight and excessive moisture.
Wiring is a critical aspect of the installation process. Correctly identify and connect the power, ground, and signal wires according to the wiring diagram provided in the manual. Use marine-grade wiring and connectors to prevent corrosion and ensure a secure connection. Proper wire routing is also important, avoiding sharp bends and potential sources of interference.
Before finalizing the installation, double-check all connections and ensure the gauge is properly grounded. A poorly grounded gauge can lead to inaccurate readings or erratic behavior. Following these steps will contribute to a successful and long-lasting installation.
Wiring Diagrams and Connections
Yamaha outboard gauge wiring utilizes specific color codes and connection types, crucial for proper functionality. Understanding these diagrams is paramount for successful installation and troubleshooting. Typically, gauges require connections for power (usually 12V DC), ground, and signal inputs from the engine’s sensors – including tachometer, speedometer, fuel level, oil pressure, and temperature.
Wiring diagrams, found in the gauge’s installation manual, detail the precise connections for each wire. Marine-grade wiring is essential, resisting corrosion from saltwater exposure. Connections should be secure, utilizing crimped connectors and heat-shrink tubing for insulation. Pay close attention to polarity when connecting power and ground.
Command Link and NMEA 2000 systems employ different wiring protocols. Command Link uses a multi-wire harness, while NMEA 2000 utilizes a backbone network. Incorrect wiring can damage the gauges or engine control unit, so meticulous attention to detail is vital. Always disconnect the battery before working with electrical connections.
Troubleshooting Common Gauge Issues
Yamaha outboard gauge problems often stem from simple causes. A common issue is a loss of power or ground; verify connections and fuse integrity. Intermittent readings can indicate loose wiring or corroded terminals – inspect all connections meticulously. If a gauge displays zero, check the sending unit and its wiring for continuity.
For digital gauges, software glitches can occur. Try a power cycle (disconnecting and reconnecting the power supply). Inaccurate readings may require gauge calibration (see calibration procedures). Command Link issues often relate to communication errors; ensure the network is properly connected and functioning.
NMEA 2000 problems can involve network drops or data conflicts. Check the backbone cable and T-connectors. If a gauge consistently malfunctions, consider replacing it. Always consult the service manual for specific troubleshooting steps related to your gauge model. Remember safety first – disconnect power before any electrical work.
Gauge Calibration Procedures
Yamaha outboard gauge calibration ensures accurate readings, vital for engine health and fuel management. Digital gauges often feature built-in calibration routines accessible through the gauge’s menu system. Consult your specific gauge’s manual for detailed instructions, as procedures vary by model.
Analog gauge calibration typically involves adjusting potentiometers on the gauge itself or at the sending unit. This requires specialized tools and knowledge; improper adjustment can worsen accuracy. For fuel level gauges, a full tank is necessary for proper calibration. Temperature and pressure gauges require known standards for comparison.
Command Link systems may utilize software calibration through a connected computer or diagnostic tool. NMEA 2000 gauges often auto-calibrate upon network connection, but manual adjustments might be needed. Always document initial settings before making changes. If unsure, seek assistance from a qualified marine technician to avoid damaging the gauge or engine.
Interpreting Gauge Readings: Engine Performance
Yamaha outboard gauges provide crucial insights into engine performance. Tachometers display engine RPM; consistently high readings under light load may indicate propeller issues or a need for gearcase lubrication. Monitoring coolant temperature is vital – sustained high temperatures signal potential overheating, possibly due to a blocked water intake or faulty thermostat.
Oil pressure gauges indicate lubrication system health. Low readings demand immediate attention, as insufficient lubrication can cause severe engine damage. Voltage gauges reflect the charging system’s output; low voltage suggests a failing alternator or battery issue. Amperage gauges show current draw, helping identify electrical overloads.
Pay attention to any fluctuations or abnormal readings. Sudden drops or spikes can indicate underlying problems. Cross-referencing multiple gauge readings provides a more comprehensive understanding of engine status. Regularly observing these parameters allows for proactive maintenance and prevents costly repairs.
Interpreting Gauge Readings: Fuel Management
Yamaha outboard fuel management gauges are essential for monitoring consumption and ensuring optimal range. Fuel level gauges, while seemingly straightforward, can be affected by tank shape and boat attitude; always account for these factors. Fuel flow gauges display real-time fuel consumption, allowing you to adjust speed and throttle for maximum efficiency.
Hours run gauges track engine operating time, crucial for scheduled maintenance intervals. Low fuel pressure warnings indicate potential issues with the fuel pump, filter, or lines, potentially leading to engine stalling. Monitoring fuel economy (miles per gallon or liters per hour) helps identify changes in engine performance or fuel quality.

Sudden increases in fuel consumption without corresponding changes in speed or load suggest a problem. Regularly calibrating fuel gauges ensures accuracy. Understanding these readings allows for efficient trip planning and proactive fuel system maintenance, preventing unexpected interruptions during your boating adventures.
Understanding Warning Signals and Alarms
Yamaha outboard gauge systems incorporate vital warning signals and alarms to protect the engine and ensure boater safety. A low oil level warning indicates insufficient lubrication, potentially causing severe engine damage; immediate shutdown is crucial. Overheat alarms signal a cooling system malfunction, often due to a blocked water intake or faulty impeller, requiring immediate attention.
Low battery voltage warnings suggest a charging system issue or excessive electrical load. Check connections and the battery’s state of charge. A check engine light (CEL) illuminates when the engine control unit (ECU) detects a problem, requiring diagnostic scanning with a compatible tool.
Understanding the specific meaning of each alarm is paramount. Ignoring warning signals can lead to costly repairs or even engine failure. Refer to your Yamaha owner’s manual for a comprehensive list of alarms and recommended actions. Proactive response to these signals ensures continued safe and reliable operation.
Replacing Faulty Yamaha Outboard Gauges
Yamaha outboard gauge replacement requires careful attention to detail. Begin by disconnecting the battery to prevent electrical shorts. Identify the faulty gauge – analog or digital – and obtain a direct replacement part number from a Yamaha dealer or reputable marine supplier. Ensure compatibility with your engine model and gauge system.
Remove the old gauge by carefully detaching the wiring harness connectors and unscrewing the mounting hardware. Document the wiring configuration before disconnecting to simplify reinstallation. Install the new gauge, connecting the wiring harness precisely as documented. Double-check all connections for security.
After re-connecting the battery, test the new gauge’s functionality. Verify accurate readings and proper illumination. If issues persist, review the wiring diagram and connections. Professional installation is recommended if you’re uncomfortable with electrical work. Proper replacement restores accurate engine monitoring and enhances boating safety.
Yamaha Gauge Accessories
Yamaha offers a range of accessories to enhance your outboard gauge system. These include gauge mounting brackets, designed for various dashboard configurations, ensuring secure and aesthetically pleasing installation. Protective covers shield gauges from harsh marine environments, extending their lifespan and maintaining clarity.
Backlighting options, such as dimmable LED kits, improve nighttime visibility and reduce eye strain. Wiring harnesses and connectors simplify installation and ensure reliable electrical connections. For advanced systems, consider a gauge adapter kit to integrate aftermarket gauges seamlessly with your Yamaha setup.
Furthermore, Yamaha’s Command Link compatibility opens doors to specialized accessories like the CL-MAX display, providing comprehensive engine data. Explore options for flush-mount installations for a streamlined appearance. Choosing the right accessories optimizes functionality, durability, and the overall boating experience.
Maintaining Your Yamaha Outboard Gauges
Regular maintenance is crucial for ensuring the longevity and accuracy of your Yamaha outboard gauges. Periodically inspect wiring connections for corrosion or damage, applying dielectric grease to prevent future issues. Clean the gauge lenses with a soft, damp cloth – avoid abrasive cleaners that can scratch the surface.
Check the mounting hardware to ensure gauges are securely fastened, preventing vibration damage. For analog gauges, verify the needle movement is smooth and responsive. Digital gauges should display clear, consistent readings without flickering. Inspect backlighting for proper function, replacing bulbs as needed.
Protect gauges from excessive moisture and direct sunlight when possible. Consider using protective covers during periods of non-use. A proactive maintenance schedule will help identify and address potential problems before they escalate, ensuring reliable performance and accurate readings for years to come.
Resources for Yamaha Outboard Gauge Information
Accessing reliable information is key to understanding and troubleshooting your Yamaha outboard gauge system. The official Yamaha website ([https://www.yamahaoutboards.com/](https://www.yamahaoutboards.com/)) provides a wealth of resources, including downloadable owner’s manuals, parts catalogs, and service bulletins specifically for your engine model.
HIFI-FORUM ([https://www.hifi-forum;de/](https://www.hifi-forum.de/)) while primarily audio-focused, demonstrates the value of user communities for technical support. Remember to verify information from online sources with official Yamaha documentation or a qualified technician to ensure accuracy and safety.